
Quick takeaways
- A bag brand starts with a sharp concept, not a broad one. "Bags for urban cyclists who carry a laptop" beats "nice everyday bags" every time.
- Validate demand before you spend on samples. A landing page, a waitlist, and ten real conversations cost almost nothing and save thousands.
- You do not need a tech pack to begin. A reference bag, sketches, and clear answers about use and structure are enough to start a real conversation with a manufacturer.
- Sampling minimum order quantity is one piece. You can hold a real prototype before committing to any production run.
- Production MOQ starts from 100 units per style, depending on the final sample and production setup. Budget for sampling, production, shipping, duties, and a margin that survives discounting.
- Plan for about six to eight weeks from a confirmed brief to a finished sample in your hands.
Starting a bag brand in 2026 is more accessible than it has ever been — low sampling minimums, designer-friendly manufacturers, and e-commerce tools have removed most of the old barriers. What has not changed is the order of operations. Skip a step and you pay for it later in revisions, dead stock, or a product nobody asked for. This guide walks the ten steps in the order that actually works.
Step 1 — Start with a sharp concept
Most new bag brands fail at the concept stage, not the manufacturing stage. The trap is starting too broad: "premium everyday bags" or "minimalist totes" describes a thousand existing brands and gives a customer no reason to choose you. A sharp concept names a specific person and a specific problem.
Compare "a stylish backpack" with "a structured 14-inch laptop backpack for women in consulting who do not want a sports bag." The second concept tells you the dimensions, the materials, the price tier, the photography, and the marketing channel. It is harder to come up with — and far easier to build, sample, and sell.
Write one paragraph that answers: who is this for, what do they carry, where do they use it, what do they hate about what they own now, and what will make them switch. If you cannot fill that paragraph, no manufacturer or marketing budget will save the brand.
Step 2 — Validate demand before you spend
The cheapest mistake to avoid is producing a bag nobody asked for. Validation does not require a finished product — it requires evidence that real people want this specific thing.
Three low-cost validation moves, in order of value:
- Ten real conversations. Talk to ten people in your target audience. Not friends — actual potential buyers. Ask what they carry now and what frustrates them. Patterns appear fast.
- A simple landing page with a waitlist. One page describing the concept, a render or a mood board, and an email capture. If you cannot get a few dozen genuine sign-ups from your own network and a small ad test, the concept needs work.
- A pre-order or crowdfunding test. The strongest signal of all: people committing money before the product exists. Platforms like Kickstarter and Indiegogo are built for exactly this kind of pre-launch validation.
Validation is not a formality. It tells you which features matter, what people will pay, and whether to proceed at all — all before you spend on sampling.
Step 3 — Turn your idea into a brief
Once the concept holds up, translate it into something a manufacturer can act on. New founders often think this means a full technical pack (a "tech pack"). It does not — not at the start. A tech pack is a detailed spec document, and a good development partner can help build one. What you need first is a clear brief.
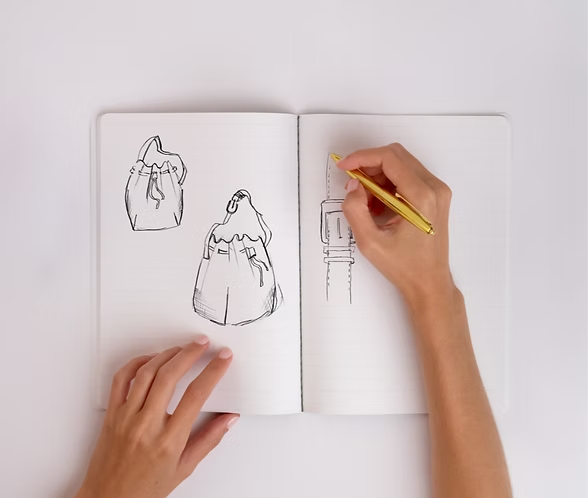
A useful first brief includes: a reference bag or two (existing products that show the structure, size, or detail you have in mind), rough sketches or annotated photos, intended use and the heaviest thing it must carry, target dimensions, material direction, hardware preferences, your target quantity, and a budget range. None of this has to be perfect. It has to be specific enough to discuss.
You do not need a polished tech pack to start. You need a clear idea, a reference, and honest answers about how the bag will be used.
Our anonymised case study of a first-time founder shows a complete project run almost entirely without a tech pack — proof that a clear brief plus structured iteration is enough to reach a production-ready sample.
Step 4 — Choose materials and construction
Material and construction decisions drive most of a bag's cost, durability, and feel — and they are the decisions first-time founders most often defer. They should be made early, because they change everything downstream.
Common bag materials and what they signal: nylon — lightweight, technical, durable, good for everyday and travel; polyester — economical, versatile, widely used for printed and recycled options; canvas — natural, structured, on-trend for totes and casual styles; PU and vegan textiles — a leather look without leather, popular for fashion-led pieces; recycled fabrics — increasingly expected, often a deliberate brand decision rather than a cost one.
If sustainability is part of your concept, it is worth understanding the standards behind the claims early. The Textile Exchange is the leading authority on preferred and recycled fibres, and facility-level audits such as Sedex / SMETA are how production ethics are verified. Knowing what these mean lets you make honest claims rather than vague ones.
Construction choices — linings, reinforcements, zippers, hardware, custom tooling — are where price quietly climbs. A bag with custom moulded hardware costs and orders very differently from a soft canvas tote. You do not have to decide every detail alone: a consultation-first manufacturer will flag the structural and material trade-offs before they become expensive sample revisions.
Step 5 — Find a manufacturing partner
This is the step most founders dread, and it is the one where the right partner changes everything. The choice is rarely "Europe or China" — it is whether you have a competent, accountable point of contact who will catch problems before they cost you.
The hybrid model that has grown most for indie brands in 2025–2026 is a Munich-based liaison and project coordination point paired with an established China-side manufacturing team. It gives a founder one accountable contact in their own time zone without the cost penalty of full European production.
We wrote a complete, separate guide on this: How to Find a Custom Bag Manufacturer in Europe — where to look, how to vet a factory without flying anywhere, and what a useful first reply looks like. The single most reliable signal: a partner who asks questions before quoting.
Step 6 — Get your first sample made
Sampling is where your brand becomes physical. The most important fact for a first-time founder: sampling minimum order quantity is one piece. You do not commit to a production run to hold a real prototype.
A paid sample is a genuine, modest commitment that filters time-wasters on both sides and gets you a manufacturer's real attention. Expect roughly three to four weeks for development, plus shipping and an internal quality check — about six to eight weeks total from a confirmed brief to a sample in your hands. Anyone promising a finished custom sample in days is reusing an existing mould or guessing.
Step 7 — Plan your first production run
Once a sample is approved, you move to batch production. Production minimum order quantity can start from 100 units per style, climbing for bags with custom hardware or tooling. This is the number that decides your real upfront budget.
Build a budget that includes every line, not just the unit price: sampling costs, the production run itself, custom tooling if any, freight and shipping, import duties and taxes for your market, payment-processing fees, photography, packaging, and a contingency. First-time founders consistently underestimate the gap between the factory unit price and the true landed cost.
Start with one or two strong styles, not a full collection. A focused first run is cheaper, faster to photograph and sell, and far less risky than spreading a limited budget across six products that each get a thin order.
Step 8 — Price, brand, and launch
Price from the landed cost, not the factory cost. A common starting framework: retail price at roughly four to five times the true landed unit cost, so the brand survives wholesale discounts, marketing spend, returns, and a real profit. If that retail number is higher than your validated audience will pay, the fix is upstream — concept, materials, or quantity — not wishful pricing.
In parallel, build the brand layer: a name and identity, product photography that does the bag justice, an e-commerce storefront on a platform like Shopify, and a launch plan aimed at the specific audience you defined in Step 1. The sharper the concept, the cheaper and more effective every one of these becomes.
Launch to the waitlist and the people who had those ten early conversations first. They are the warmest audience you will ever have — and their feedback on the first run shapes the second.
Next step
Starting a bag brand is a sequence: a sharp concept, validated demand, a clear brief, deliberate materials, the right manufacturing partner, a first sample, a focused production run, and pricing that survives the real world. Each step done in order saves money on the next.
If you are somewhere in that sequence and want a practical second opinion, send what you have — even an early-stage idea, a sketch, or a reference bag — via the contact form. The first reply will be feasibility questions, not a hard quote.
How ProtoBag Studio can help at each stage:
- Development consultation — a review-first read of your brief before any money is spent on sampling.
- Custom bag sampling — paid first prototypes, sampling MOQ of one.
- OEM batch production — across backpacks, totes, duffels, slings, cosmetic cases, and technical bags.
- The eight-step process — exactly what happens between your first message and a finished sample.
- The manufacturer-finding guide — a deeper companion to Step 5.
Wherever you are in the journey, we hope this guide saved you a few weeks. Good luck with the launch.